
Fitting a wall decal for the very first time can be a bit daunting, especially if you have not even seen them being applied before. That's totally understandable, but take it from us, they really are simple to apply so there is no need to worry ! To make it even easier we have written a comprehensive step by step fitting guide with images to assist you. In addition to this our videos at the end will show you exactly how to apply wall stickers and decals in a in a very simple visual guide.

How to put wall stickers up - A detailed written guide with hints and tips
#1. Clean the wall or surface from any dirt or grease and make sure it is dry. (If the wall has recently had fresh paint applied allow a couple of weeks for the paint to fully dry out) A good way of making sure that the wall/surface is free from grease and clean, although this is not necessary, is to use sugar soap or another similar product (these are available in most do it yourself shops and large supermarkets)
#2. Remove the vinyl sticker/s from the cardboard tube and lay out on a flat surface, you will also find an envelope containing your application tool and detailed step by step fitting instructions.
We advise reading the instructions in full before starting, just to get yourself familiar with the full application process. There are also 'how to' fitting videos at the bottom of this page, should you wish to watch the full visual guide to see how simple the full process is.
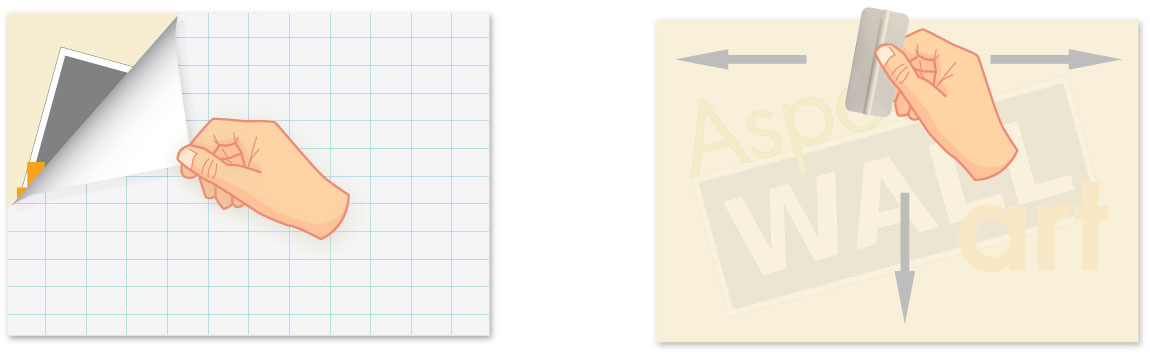
#3. How to apply your wall sticker and level by eye - simply remove the backing paper and hold (using the top two corners) onto your chosen surface where required (Do not press the sticky vinyl parts against the wall until you are happy with the position and are applying it). Use the FREE spreader supplied to fully apply the vinyl sticker against the wall, using firm pressure on each stroke. Starting from the top middle, go fully left, then fully right, and work your way down the sticker using the same process (for larger stickers another pair of hands may be necessary to hold the sticker whilst the other person is spreading against the wall)
Important tip: Always lay the the sticker face down before removing the backing paper and peel it away from the see through application tape rather than the other way round. This will ensure that the vinyl will hold to the application tape and is much less likely to stay stuck to the backing paper. Should any parts of the vinyl try to do this simply press them back against the sticky application paper and try again.
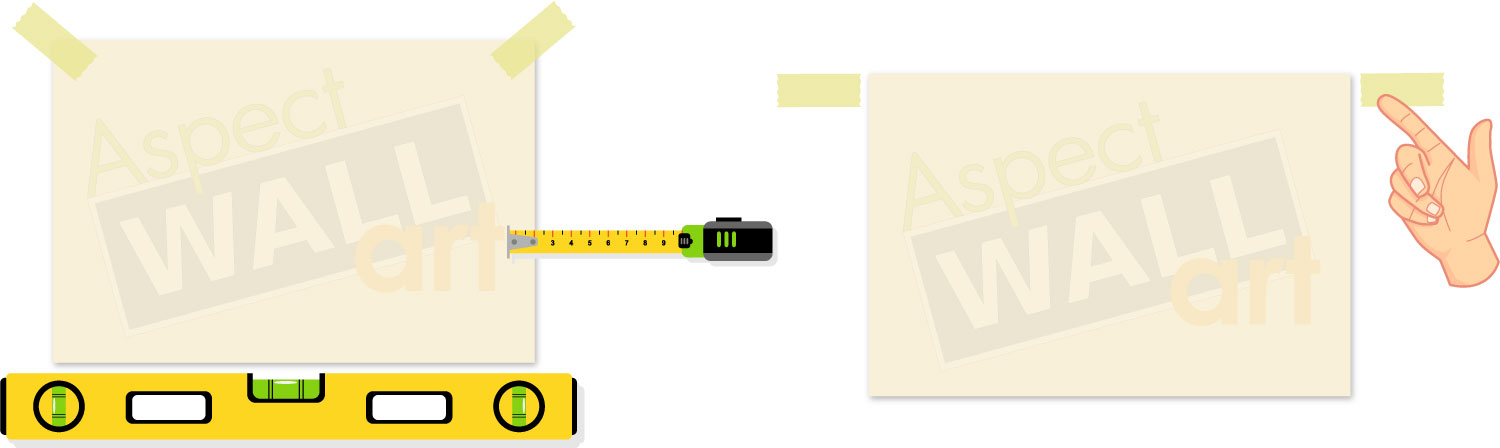
How to fit a wall sticker that requires being perfectly level - Before removing the backing paper, hold your sticker to the wall, temporarily using tabs of masking tape in each top corner. Use a tape measure and/or spirit level to level the design correctly (Be sure to level the vinyl parts wherever possible, as opposed to the outer transfer edge, as we don’t guarantee that it is perfectly levelled to the vinyl). Keep lifting and pressing down the masking tape tabs whilst levelling each side, until it is in the perfect position. Now attach two more pieces of tape each side of the sticker, horizontally level with the top edge, but not overlapping any of the sticker. (Alternatively use a pencil and lightly mark each side where the top edge of the sticker should be fitted, these will be your guides to follow when applying it to the wall). Take the sticker away from the wall, just leaving the tape guides or pencil marks. You are now ready to apply your wall sticker by following the instructions at the start of step 3.
#4. Top Tip: Once fully applied to the wall leave the vinyl wall sticker for at least 10 minutes before removing the application tape covering the vinyl. This is simply to ensure that the adhesive has time to fully adhere to the chosen surface, making removal of the application tape even easier.
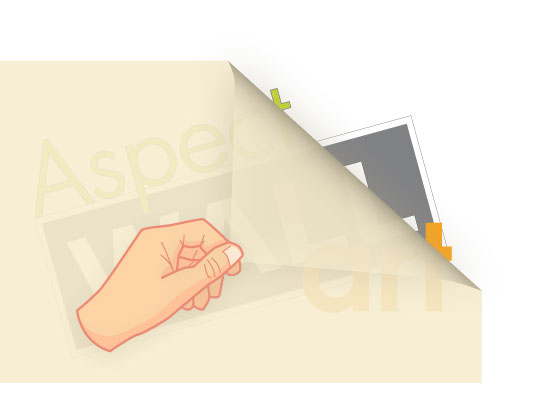
#5. Carefully peel off the application tape layer to reveal your chosen vinyl wall art design in all its glory ! If any part of the vinyl sticker starts to come away from the surface when removing the application tape, simply run the application spreader or a finger/thumb back over whilst the cover paper is still attached, and try again. (We advise being extra careful with applying to textured walls during this stage)
To see how easy it is in practice, simply watch the videos below.....
Now that you are familiar with the steps needed to fit your wall sticker/s it's time to choose the perfect design for your home, so here are some quick links....
WALL DECOR STICKERS
PERSONALISED WALL TRANSFERS
QUOTE WALL STICKERS
QUALITY CHILDRENS WALL ART STICKERS
Still need convincing? Check out our 'Why Choose Us' information.