

When it comes to wall decor considerations in your home, decorative vintage and retro metal signs are a robust choice that can add a character, history and design to any space. They're versatile, durable, and possess a charm that other wall art options might lack. However, if you have not fitted one before, you may require some advice on how to hang a metal sign to your wall.
Disclaimer: As an Amazon, Wayfair and Awin associate, we do receive a small commission from qualifying purchases made via links within this article.
Preparation and Planning
Before attempting to affix your metal sign to the wall, it's important to take into account what type of wall you're attaching it to. Whether your wall is made of drywall, brick, or wood, different surfaces demand specific types of hardware to guarantee a sturdy installation.
Choosing the Correct Location
The next step I like to consider is where the metal sign will make the most impact, while also factoring in practical aspects such as visibility and traffic flow. The ideal spot is often at eye level, approximately 152 to 160 centimetres from the floor.
Gathering the Necessary Tools
I suggest that you gather all necessary tools in advance to avoid interruptions and having to search for things after staring the job. A complete toolkit for fitting a metal sign should include:
- Drill: To create precise holes for screws or wall anchors.
- Screwdriver: For tightening screws securely.
- Tape Measure: Essential for accurate measurement and alignment.
- Stud Finder: To locate studs within the walls for a stable fix.
- Pencil: To mark drill points and levels on the wall.
Identifying Wall Studs (for plasterboard walls)
Using a stud finder, Identify the location of any wall studs that you may be able to utilise to ensure the sign is securely anchored. If no studs align with the planned location, other fixing methods will be required. This step is particularly important, as larger metal signs can be heavy, and securing it to studs wherever possible can prevent future sagging or damage to the wall surface.
Measuring and Marking
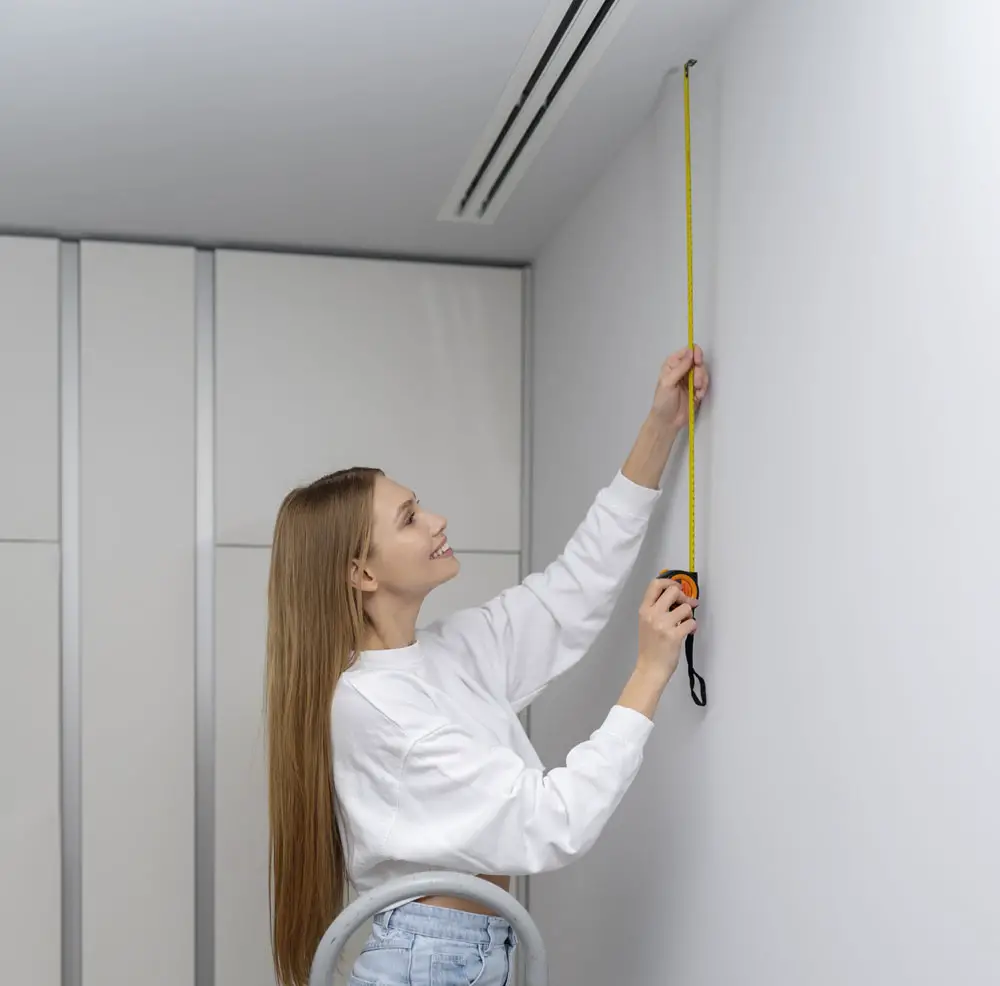
After getting the tools together, the next step involves the placement and alignment of the metal wall sign. Taking careful measurements with a tape measure is critical to ensure that the sign is centred and aligned correctly with other features in the room. Using my tape measure again, I will then determine the sign's dimensions and the necessary spacing required from furniture and other wall decorations. Finally, with a pencil, I lightly mark the spot on the wall where the sign will be placed.
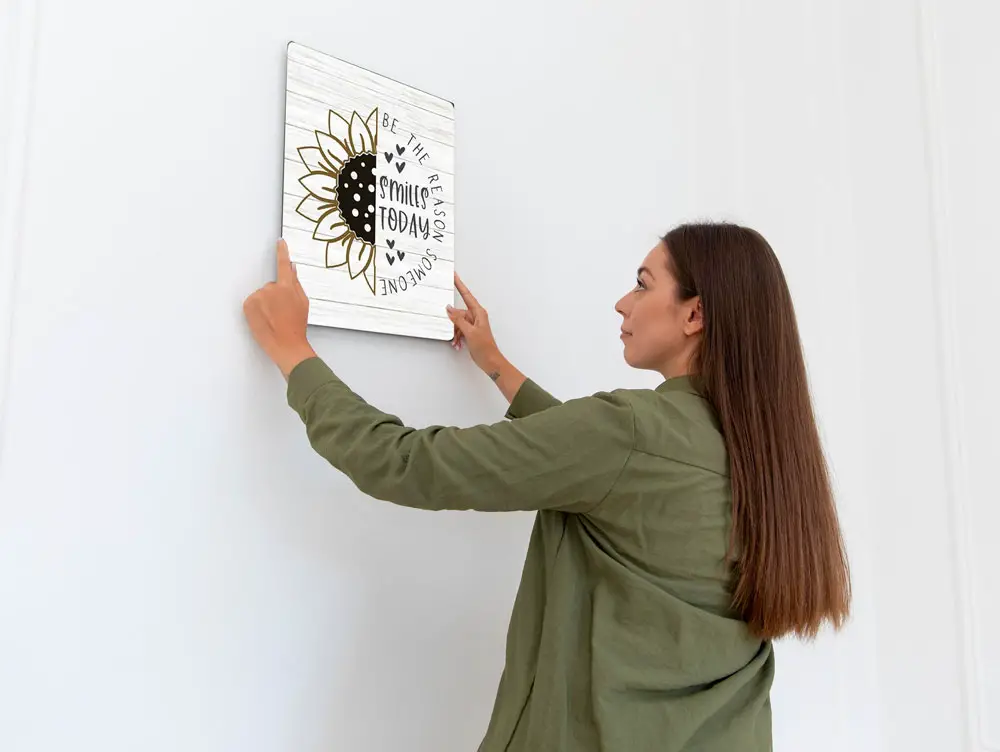
Mounting the Metal Sign
When the time comes to start fitting the sign to the wall, precision and care are required to securely mount your sign and for it to appear correctly aligned on the wall.
Securing the Hardware (if required)
To begin, it's essential to select the correct fixing method for the type of wall and the weight of the sign. Depending on the sign's size and weight, I might simply fix it to the wall using double sided glue tape or command strips. For a larger heavier metal sign however, I will fix it with wall anchors, such as raw plugs, or plasterboard fixings.
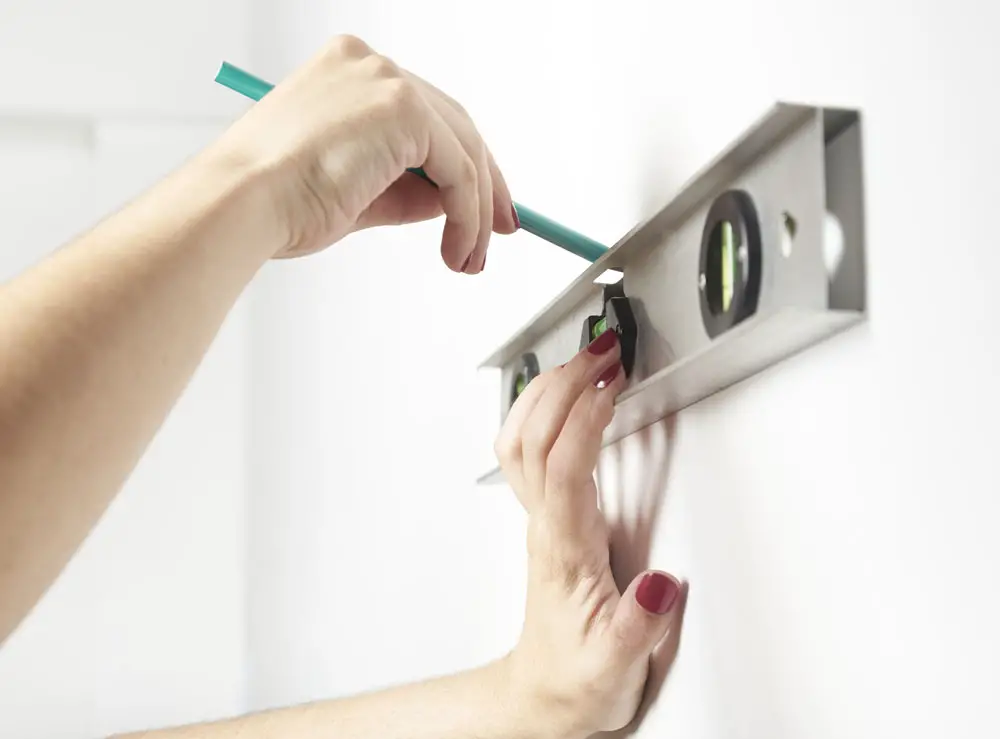
When drilling holes for wall plugs, I always ensure that my drill creates pilot holes slightly smaller than the anchors for a secure fit (If there's a stud behind the plasterboard, long, sturdy screws can be driven in directly without the use of wall anchors). It's always best to measure and use a spirit level to mark any drill points, making sure they're perfectly horizontal.
Attaching the Metal Wall Sign (with wall plugs)
Once my wall plugs are in place, I will hold the metal sign against the wall in line with the anchor holes (for larger signs, I might use a paper template or masking tape to outline the sign’s position, ensuring that the hardware aligns with the pre-made holes). Before fully tightening the fixing screws, I will use a level one final time to ensure that the metal sign is perfectly straight.
Final Adjustments and Safety Checks
Once complete, I will conduct a few checks for stability and balance. Gently pulling on the sign tests its security and ensures it doesn't easily move or come away from the wall. A small adjustment may be needed, either by tightening screws or repositioning the sign slightly.
 Author: Matthew Chiappini