Installing electric underfloor heating can significantly enhance the comfort of your home and reduce energy costs. This step-by-step guide will walk you through the process, making it accessible for DIY enthusiasts. From preparing your floor to setting up the thermostat, you'll learn everything needed for a smooth installation.
Assessing Project Scope and Costs
Evaluating the project scope and estimating costs are critical steps when installing electric underfloor heating. Understanding what the project involves and how much it will cost helps in planning effectively.
Determining the Scale of Renovation
To begin, measure the width and length of the room where you plan to install the heating system. It’s essential to leave about 50mm of space around the edges for expansion.
Choose the type of electric underfloor heating system that fits best: thin mesh, quick matting, budget, foil, or loose wire systems. Each has different costs and installation requirements.
Avoid placing the heating elements under permanent fixtures like kitchen units or heavy furniture. This ensures efficient heat distribution and prevents overheating.
Calculating the Overall Cost
Projects involving electric underfloor heating can vary significantly in terms of cost. For example:
- Thin mesh systems: £45/m² to £50/m²
- Quick matting systems: £55/m² to £60/m²
- Budget systems: £15/m²
- Foil systems (for carpets): £40/m² to £50/m²
- Loose wire systems: £50/m² to £55/m²
Installation costs can range from £25/m² to upwards of £90/m² based on the complexity and type of system. Consider additional costs for insulation boards and a qualified electrician if needed.
Keep in mind that installation might be cheaper in new builds or extensions, where the system can be designed from the start. Factoring in these costs ensures a smooth project without unexpected expenses.
Choosing the Right Type of Underfloor Heating
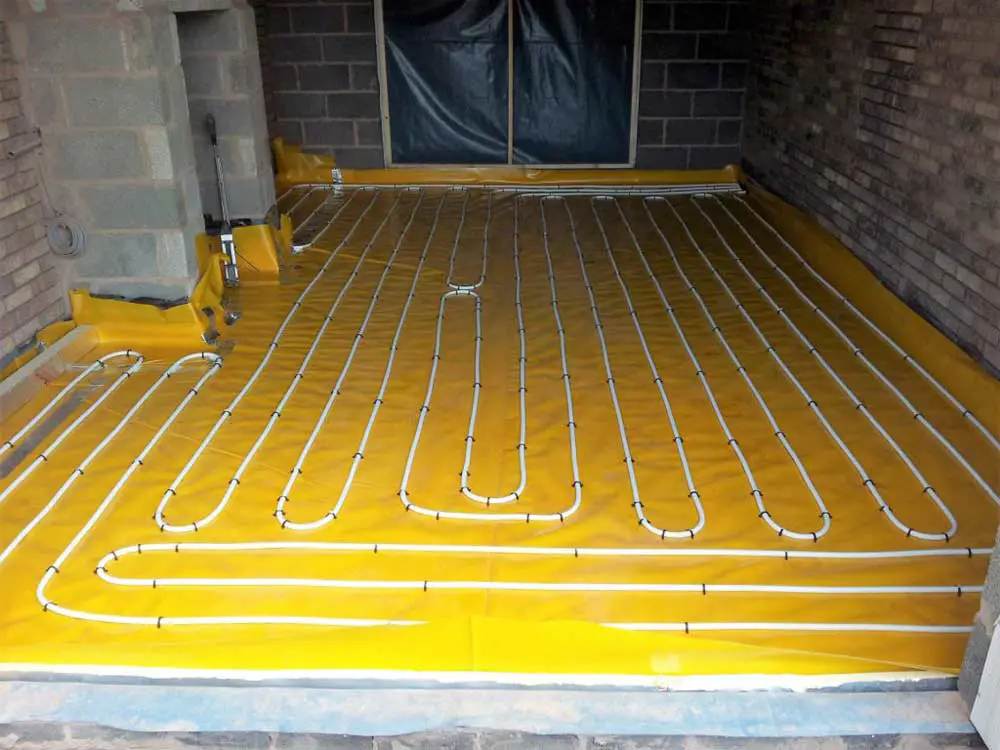
Image credit: underfloorheatingsystems.co.uk
Choosing the right type of underfloor heating system is crucial to ensure efficient heating and comfort in your home. The main options are electric and wet systems, each with its advantages and considerations based on the room and usage.
Electric Vs Wet Systems
Electric Underfloor Heating Systems: Electric systems use electric cables or mats placed directly under the floor. They are easier and quicker to install compared to wet systems, especially in retrofit projects. Electric systems are ideal for smaller rooms or areas that require quick heating. They have lower installation costs, ranging from approximately £15 to £60 per square metre.
Wet Systems: Wet systems, or hydronic systems, use water heated by a boiler. The heated water runs through pipes laid under the floor. These systems are more suited for new builds or major remodelling projects. They are more efficient for larger areas but come with higher installation complexities and costs.
Assessing the Suitability for Your Room
Room Type and Size: For smaller rooms or spaces, electric systems are generally more practical due to their ease of installation and quick heating capabilities. In larger rooms, wet systems are more energy-efficient and provide consistent heating across the entire floor area.
Flooring and Insulation: Different flooring materials affect the performance of underfloor heating. Tiles and stone are conducive to both electric and wet systems due to their good heat conduction. Proper insulation is essential to prevent heat loss and improve system efficiency. Inadequate insulation can lead to higher energy consumption and reduced performance.
Usage Patterns: Consider how often the room will be used and for how long. Electric systems are suitable for rooms needing rapid heat, such as bathrooms. For spaces that require constant heating, like living rooms, a wet system may be more appropriate due to its consistent output and efficiency.
Preparation for Installation
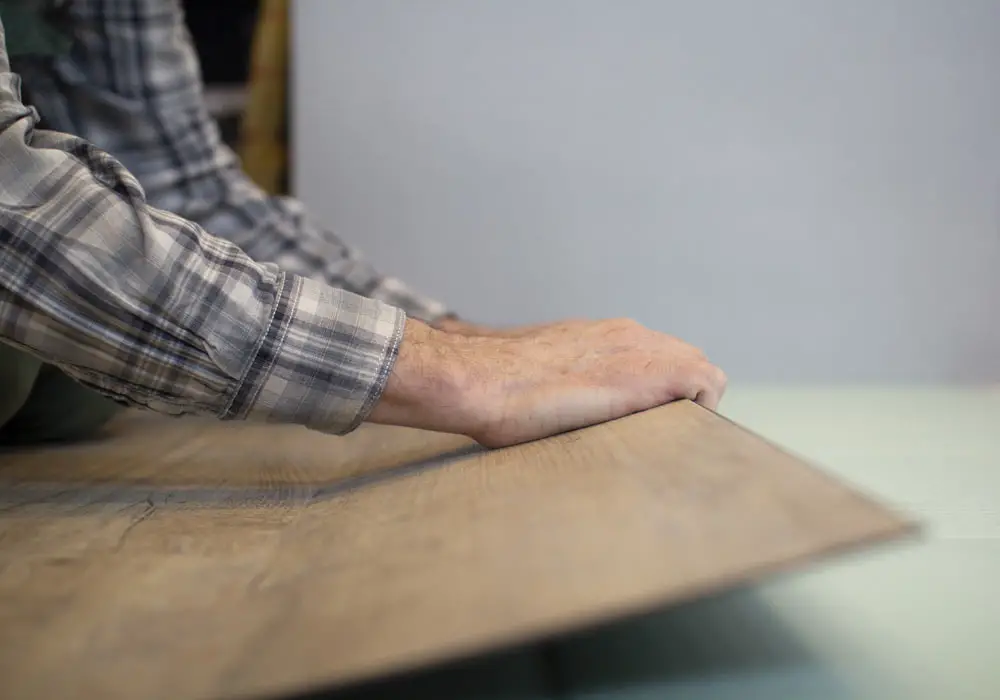
Image credit: lxhausys.com
Before you begin installing electric underfloor heating, there are crucial steps to ensure a successful setup. Proper preparation ensures efficient heating and prolongs the lifespan of your system.
Preparing the Subfloor
First, you need to make sure the subfloor is clean and smooth. Any debris, dust, or uneven surfaces can affect the installation and operation of your heating system.
If you’re working with a timber subfloor, check that it’s free from rot and secure any loose parts. It’s often best to add a layer of plyboard or another stabilising material over timber floors to provide a firm foundation.
For concrete floors, ensure they are dry. Any moisture can lead to complications, so it's important to use a damp-proof membrane if there's any concern about moisture.
Sweep and clean the floor thoroughly before proceeding.
Insulation and Its Importance
Insulation is a key part of electric underfloor heating. Using insulation backer boards can significantly increase the efficiency of your heating system. These boards help to minimise heat loss and ensure that most of the heat travels upwards into your room.
- Insulation boards create a barrier between the heating system and the subfloor.
- They’re especially important on concrete floors, which tend to absorb heat.
Place the boards directly over the subfloor. Make sure to follow the manufacturer’s guidelines for installation. The boards can usually be cut to fit using a utility knife.
Using proper insulation can reduce energy consumption and keep your floors warmer for longer. It’s a cost-effective step that enhances the overall performance of your heating system.
Consider the type of flooring you plan to install on top of your underfloor heating. Some floor types, like tiles, conduct heat better than others, which can impact how much insulation you need.
Materials and Tools Required
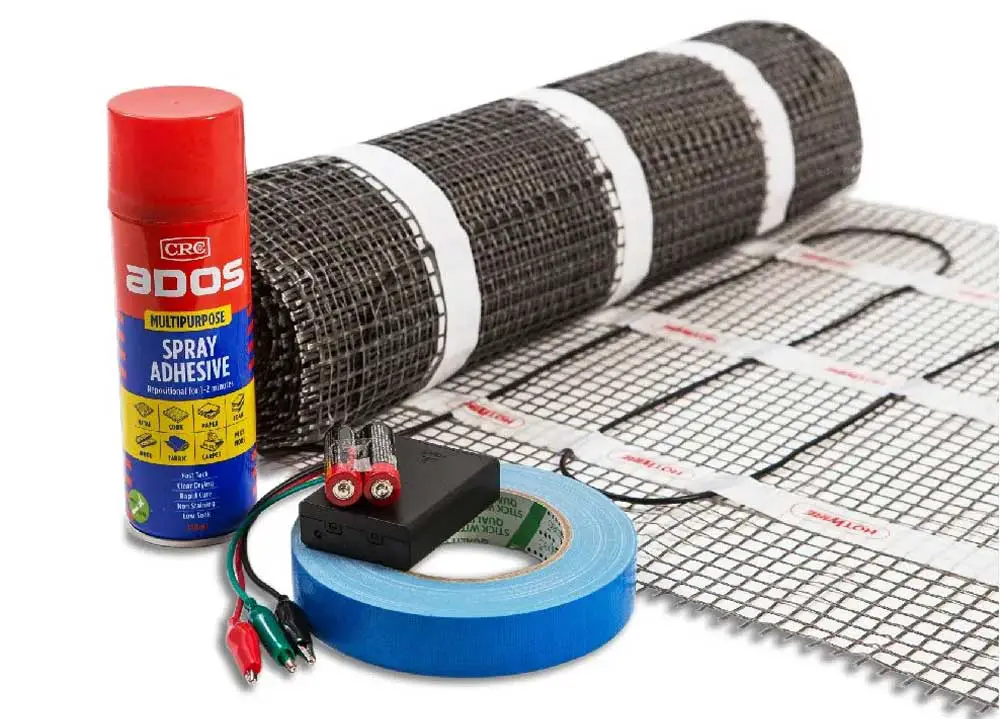
Image credit: theheatingcompany.co.nz
To install electric underfloor heating, you need specific materials and tools. This section details the essential components and equipment to ensure a smooth installation process.
Electric Underfloor Heating Components
You’ll need the following key components:
- Electric Underfloor Heating Mat: This mat consists of pre-spaced heating cables attached to a mesh, simplifying installation.
- Underfloor Heating Cables: You can opt for loose heating cables, giving more flexibility in layout.
- Matting: Insulation boards or mats help increase efficiency by reflecting heat upwards.
- Thermostat: A crucial element, it controls the temperature of the floor.
- Sensor: A floor sensor connected to the thermostat ensures accurate temperature readings.
These components are essential for creating an efficient and easy-to-control heating system.
Installation Tools and Equipment
You also need specific tools for installation:
- Multi-meter: This device verifies electrical connections and ensures the heating system is functioning correctly.
- Tape Measure: Accurate measurements are vital for laying out the heating mats or cables.
- Marker and Pencil: Use these to mark the layout and positions on the floor.
- Utility Knife: Handy for cutting mats and insulation.
- Trowel: Important for spreading adhesive evenly on the floor surface.
- Screwdriver: Needed to connect the thermostat and other components.
- Drill: Useful for making necessary holes for fixing sensors or cables to the wall.
Having these tools ensures the accurate installation of your electric underfloor heating system.
Installing the Electric Underfloor Heating System
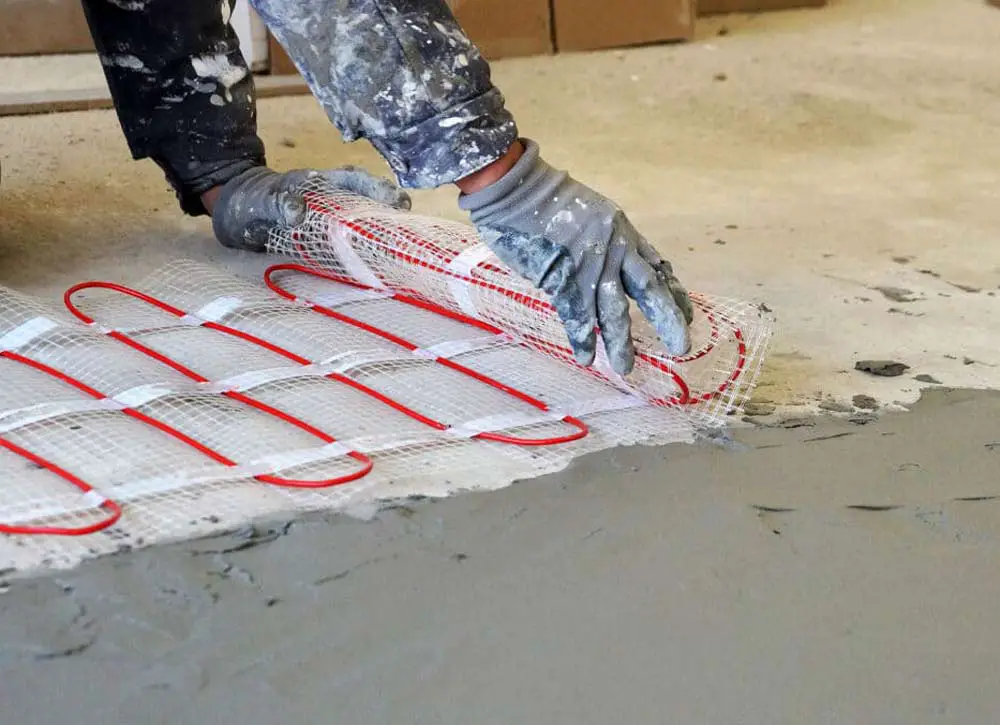
Image credit: concreteflooringsolutions.co.uk
Installing an electric underfloor heating system involves several key steps, including laying the heating element, connecting it to the power supply, wiring the thermostat, and testing the system.
Laying the Heating Element
Begin by measuring the room and preparing the floor. Make sure the subfloor is clean, dry, and insulated. After measuring, roll out the heating mat or cable according to your room layout. It's crucial to leave about 50mm of space around the edges of the room and never lay the heating elements beneath kitchen units or other heavy fixtures.
Secure the heating elements to the floor using the adhesive backing on the mats or specialised tape for loose cables. Flatten out any bumps and make sure the elements are evenly spaced. Your aim is to cover the floor area without overlapping any sections, which could cause overheating.
Connecting to the Power Supply
First, turn off electricity at the mains. Then run the power cables from the heating elements to the junction box. Use conduit to protect the wires as they travel through walls and floors.
Connect the power cables to the supply, ensuring that the connections are secure. Use a multi-meter to check the resistance of the cables and verify they match the manufacturer’s specifications. This step helps to ensure there are no faults in the cable.
Wiring the Thermostat
Install the thermostat on the wall at a convenient height. Typically, about 1.5 meters from the floor is ideal. Run the sensor probe from the floor to the thermostat through a protective conduit, ensuring it is centrally located between heating cables to accurately measure floor temperature.
Connect the sensor wires and power cables to the thermostat according to the wiring diagram provided by the manufacturer. Double-check all connections to ensure they are secure and correctly placed. Take care to follow the instructions precisely to avoid any electrical issues.
Testing the System Before Installation
Before laying the final floor covering, test the system to ensure everything functions correctly. Switch the power back on and set the thermostat to a low temperature. Gradually increase the temperature and monitor the heating elements for an even distribution of warmth.
Use a multi-meter to perform a second resistance test, ensuring the readings match those recorded before installation. This step ensures that the underfloor heating system works efficiently and safely before you finish the flooring. Once you confirm that everything operates correctly, you can proceed to lay your final floor covering.
Choosing and Laying the Flooring
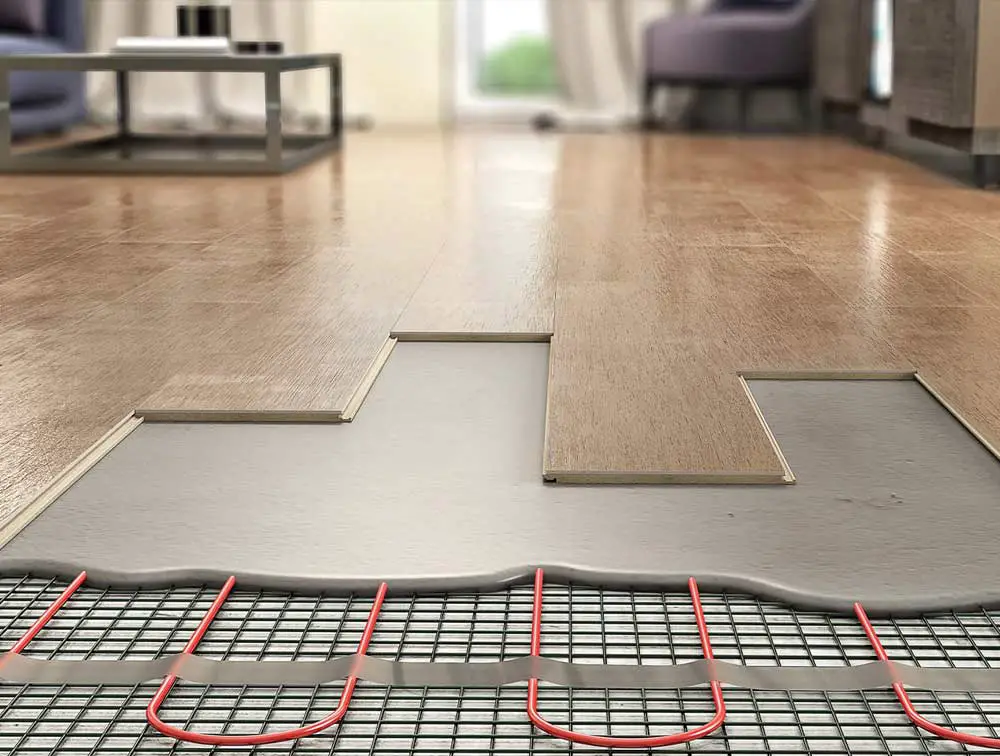
Image credit: havwoods.com
When installing electric underfloor heating, selecting the right flooring and laying it properly is crucial for optimal performance. The information below covers compatibility with various floor types and installing the system over existing floor finishes.
Compatibility with Various Floor Types
Electric underfloor heating can be used with different floor types. Tiles are excellent due to their good heat conductivity and durability. Ensure the tiles are thin enough to let heat pass through but thick enough to prevent cracking.
Wooden floors like oak can also be a good choice. However, always check the maximum thickness specification from the heating system manufacturer. Wood can insulate heat, so thin planks or engineered wood work best.
Laminate flooring is another option. Make sure it is designed for use with underfloor heating to avoid warping or damage. Carpet can be used but only with a suitable underlay. Look for thin carpets with a tog rating of 2.5 or less to ensure efficient heat transfer.
Installation Over Existing Floor Finish
If you plan to install the heating system over an existing floor, preparation is key. First, clean the surface thoroughly to remove dust and debris, ensuring good adhesion of the heating elements.
For tiles, you might need to apply a levelling compound to create a smooth surface. For wooden and laminate floors, ensure they are securely attached to avoid movement once the heating system is installed.
When installing over carpet, remove the carpet and underlay first. Install a new, compatible underlay before laying the heating elements. Screed can be added over the heating mats for even heat distribution and to protect the elements.
Correct preparation and following these tips will enhance the efficiency and longevity of your electric underfloor heating system.
Final Steps and System Commissioning
Once you've laid the heating cables and sensor, it's important to finalise the flooring and conduct a thorough system checkout to ensure everything operates correctly.
Final Floor Finish Application
Before turning on your heating system, apply your chosen floor finish. Tile, laminate, and engineered wood are ideal for underfloor heating. Check the manufacturer’s instructions for compatibility.
For tiles, use a suitable flexible adhesive and grout. Allow sufficient drying time. Laminate and wood floors require an underlay designed for heat distribution. Do not use traditional carpet underlay, as it may block heat transfer.
Important Tips:
- Check the floor finish: Compatibility with heated floors.
- Follow application instructions: Manufacturer guidelines for adhesives and underlays.
- Avoid thick flooring: It can reduce heat efficiency.
Final System Test and Commissioning
Hire a qualified electrician to complete your system connection. They’ll connect the thermostat and check wiring for safety. Proper commissioning includes checking the sensor's placement and functionality.
Once connected, turn on the system to a low setting. Monitor for unusual sounds or malfunctions. If the system performs well, gradually increase the temperature to the desired level, while ensuring no hot spots or cool areas.
Steps for testing:
- Hire a professional: Ensure safe wiring and connections.
- Initial low setting: Monitor system behaviour.
- Gradually increase temperature: Look out for inconsistencies.
This ensures your underfloor heating system runs safely and efficiently.
Sustainable and Efficient Heating Considerations
Adopting sustainable practices and ensuring energy efficiency in your electric underfloor heating system can significantly reduce both your environmental impact and energy bills. The following subsections focus on key factors to consider for a more efficient and green heating system.
Energy Efficiency and Running Costs
Electric underfloor heating systems can be more energy-efficient compared to traditional radiators since they distribute heat more evenly across the floor.
Make sure to insulate your floor properly to prevent heat loss. Using a good thermostat allows you to control the temperature closely, reducing unnecessary energy use. Opt for low-energy systems and make use of floor sensors; these can cut down operational hours. Typically, systems are only active for 2-4 hours daily, which makes them cost-effective in the long run.
Choosing the right type of system is crucial. Options like thin mesh systems might be a bit more expensive initially but often prove to be more efficient. Check if the total load of the system does not exceed the capacity of your electrical circuit.
Integration with Renewable Energy Sources
Connecting your electric underfloor heating to renewable energy sources such as solar panels can make your home much more sustainable. These integrations effectively lower your carbon footprint and help in sustainable building practices.
You might also consider pairing your system with a heat pump. Heat pumps are effective in providing consistent warm temperatures while using less energy. Ground-source heat pumps can provide a reliable heat supply and complement your electric underfloor heating system.
Another thing to think about is the use of smart home integration. Automated systems connected to renewable sources can maximise efficiency and ensure that your heating is as green as possible. This can include timed heating schedules and adaptive climate control based on external weather conditions.


 Author: Matthew Chiappini